Survive a PsychoWiki

Survive a Psycho Abilities and Survivor Skill Guide

Last updated:

Match your ability bar to the right controls, then use healing and disruption alongside your gun. Your survivor loadout determines what Z, X and G activate; Adam and Capri have separate attack kits.
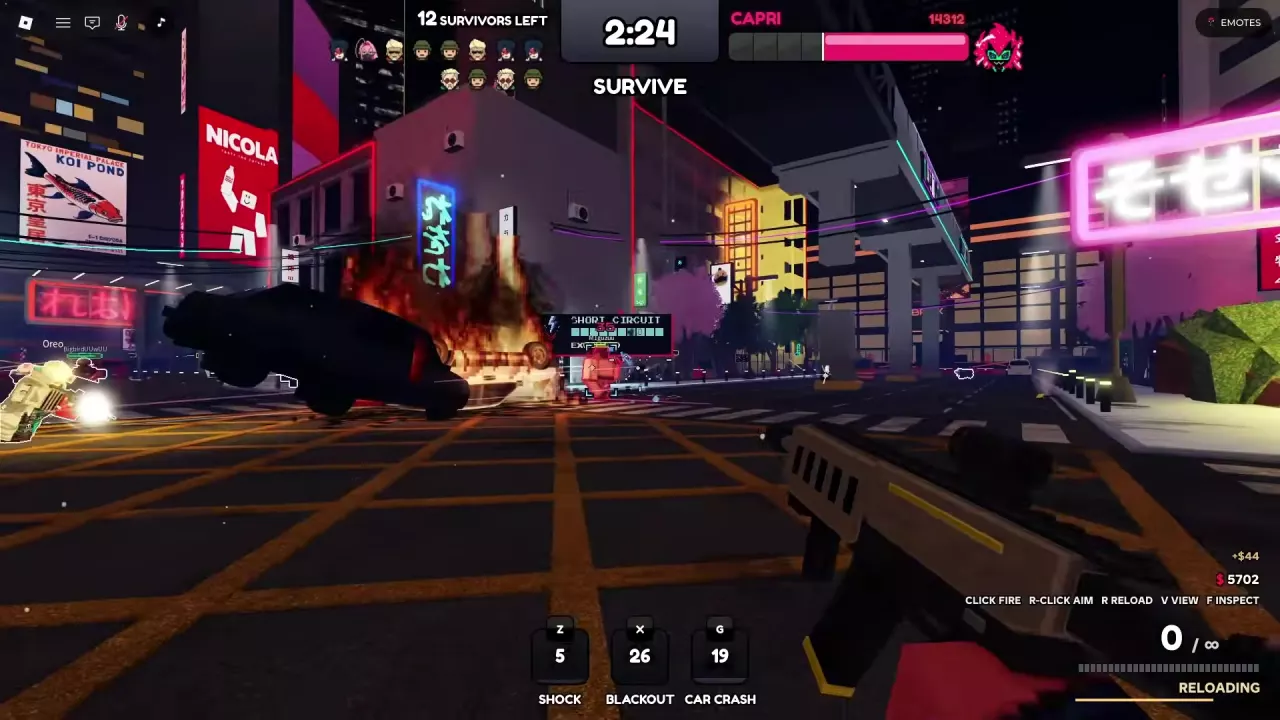
Short Circuit execution feedback appears over Capri during a street fight.

Abilities by Loadout and Role

Read the names on your current ability bar before pressing a key. The three survivor combinations are Flashbang / King's Shot / Smoke, Shock / Blackout / Car Crash, and Maine's Cannon / Fuel Cell / Psychosis. Within each combination, those abilities occupy Z / X / G, respectively.

After use, a slot displays a cooldown countdown, then returns to its icon when ready. A remaining-time reading partway through a fight is not the ability's full cooldown. Flashbang, King's Shot, Cannon and Fuel Cell all have countdown feedback to help you track availability.

Choose your approach around the effect you need:

  • Recovery while firing: Smoke lets you regain health without giving up shooting or reloading while its healing status is active.
  • Disruption alongside gunfire: Shock provides a Short Circuit quickhack, Blackout interferes with selected killer skills, and Car Crash adds a vehicle attack.
  • A burst of sustained Zhuo fire: Maine's Psychosis activates Berserk. See Maine's combat guide for the weapon and buff cycle.

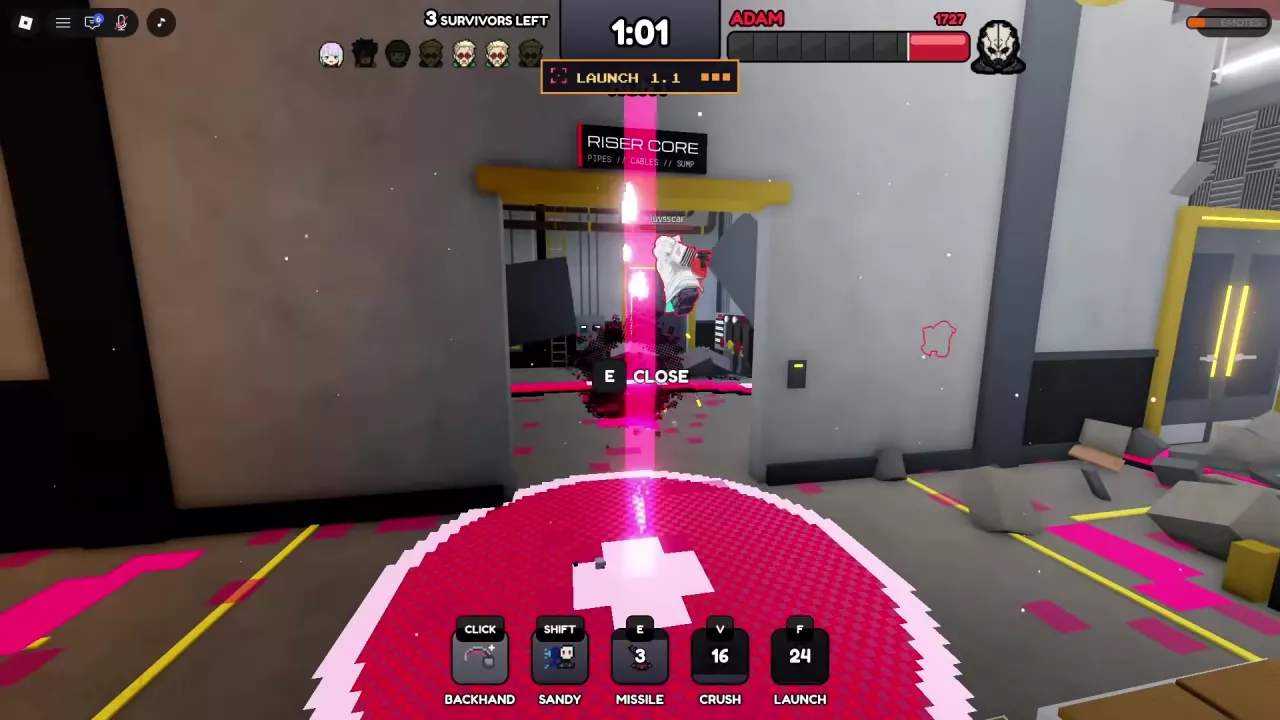
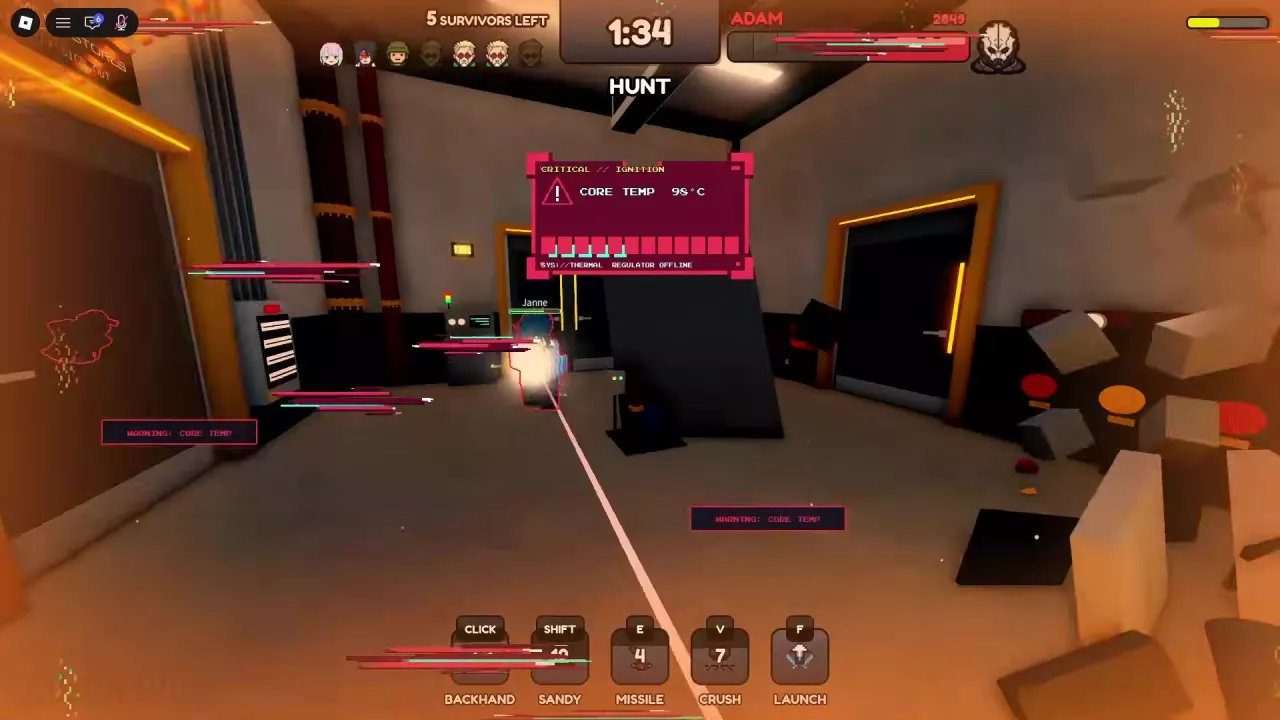
Adam's five actions belong to the Adam Smasher Psycho role. Backhand is his click attack; Sandy activates Sandevistan with a blue screen effect, meter and DODGED counter. Missile has an aiming frame and projectile trail, Crush displays a countdown after use, and Launch produces a short countdown and highlighted ground area.

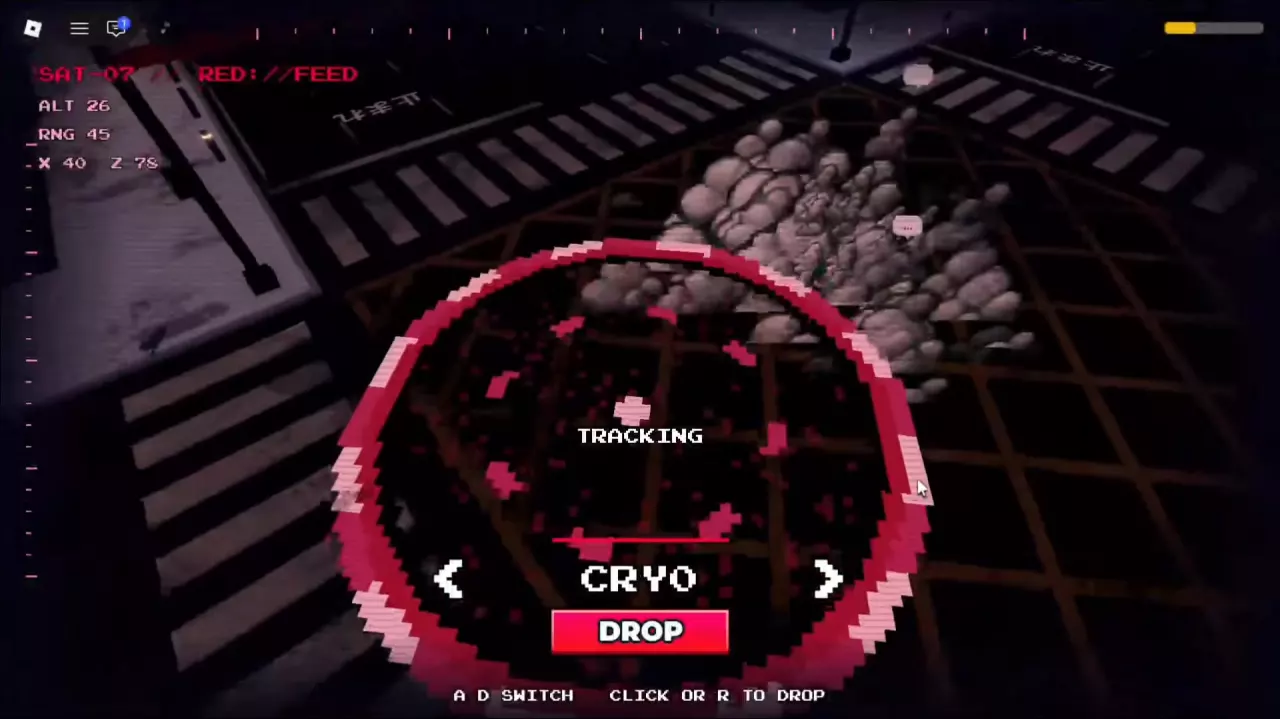
Capri's five actions belong to the Capri Psycho role, separate from the Capri survivor class. Redline attacks nearby survivors, Overdrive provides car movement, Thunder produces lightning effects, Watch highlights survivors, and Satellite opens a target feed for a strike.

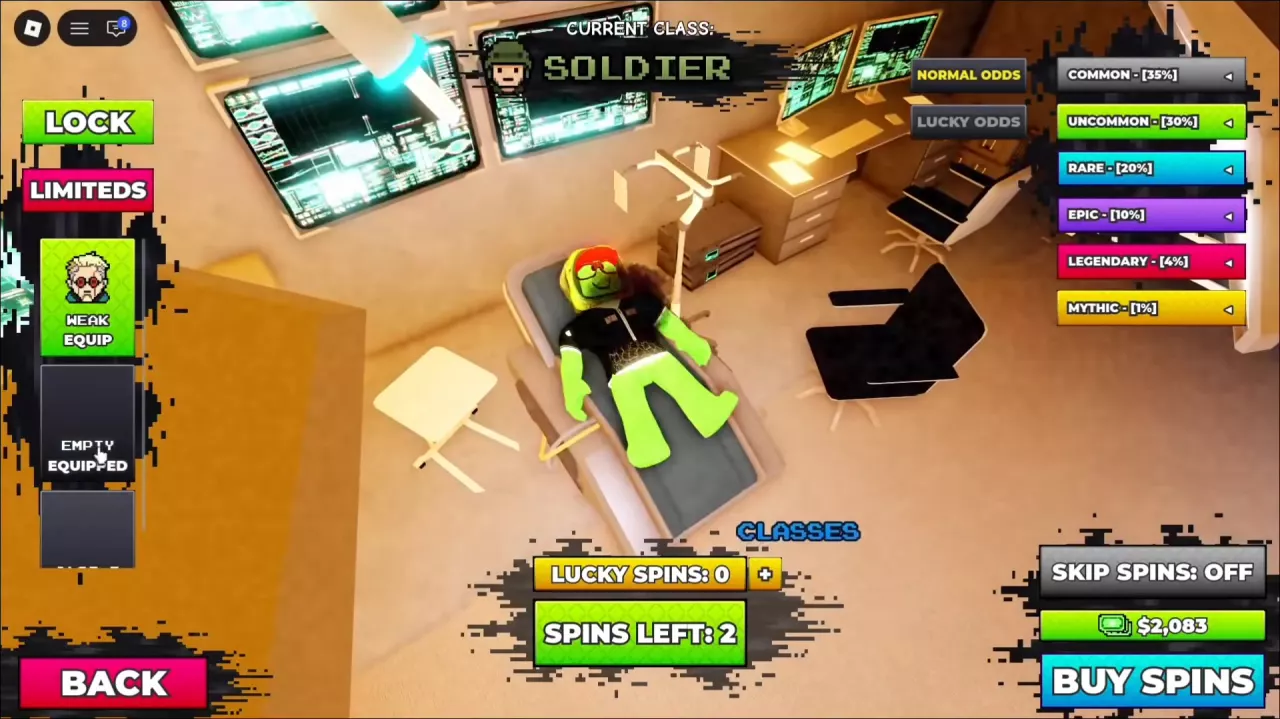
For equipping and switching survivor configurations, use the classes and loadouts guide.

Survivor Abilities
NameKey
Smoke
G (Flashbang, King's Shot and Smoke loadout)
Flashbang
Z (Flashbang, King's Shot and Smoke loadout)
King's Shot
X (Flashbang, King's Shot and Smoke loadout)
Shock
Z (Shock, Blackout and Car Crash loadout)
Blackout
X (Shock, Blackout and Car Crash loadout)
Car Crash
G (Shock, Blackout and Car Crash loadout)
Psychosis
G (Maine loadout)
Cannon
Z (Maine loadout)
Fuel Cell
X (Maine loadout)

Smoke

Effect
Creates a smoke area where HIDDEN can provide healing while you keep shooting.
Healing rate
5 HP/s (HIDDEN active inside the smoke)
Can shoot while Hidden
Yes (HIDDEN active inside the smoke)
Example cooldown remaining
29 seconds (After use during a street fight against Capri)

Flashbang

Cooldown display
The slot counts down after use and returns to its icon.
Example cooldown remaining
10 seconds (Combat against Adam)

King's Shot

Cooldown display
The slot displays a countdown after use.
Example cooldown remaining
8 seconds (Combat against Adam)

Shock

Effect
Uses a Short Circuit quickhack sequence with upload progress, execution feedback and electrical effects near the target. (Combat against Adam or Capri)
Cooldown display
The slot displays a countdown after use.
Uses the quickhack associated with
Short Circuit (SHORT CIRCUIT upload and execution sequence)

Blackout

Effect
Darkens and desaturates the scene while affected killer abilities display NO SIGNAL. Character outlines remain visible. (During the interference countdown)
Survivors can keep shooting
Yes (During Blackout)
Example cooldown remaining
25 seconds (After activation during an indoor fight against Adam)
Example effect time remaining
4.5 seconds (Survivor NO SIGNAL countdown after activation)
4.7 seconds (Adam's JAMMED countdown)
Recovery
Affected skill slots return to their icons or cooldown displays after the interference ends; another Blackout can follow. (Capri's affected skill slots)
Displays the interference indicator
NO SIGNAL (During Blackout)
Accompanies the killer interference state
JAMMED (Killer HUD during Blackout)
Causes the skill slot to display NO SIGNAL
Sandevistan (Adam's Sandy slot during JAMMED)
Missile (Adam during JAMMED)
Overdrive (Capri during JAMMED)
Thunder (Capri during JAMMED)
Watch (Capri during JAMMED)
Satellite (Capri during JAMMED)

Car Crash

Effect
Brings a vehicle into the fight, with lock and remote takeover feedback.
Vehicle feedback
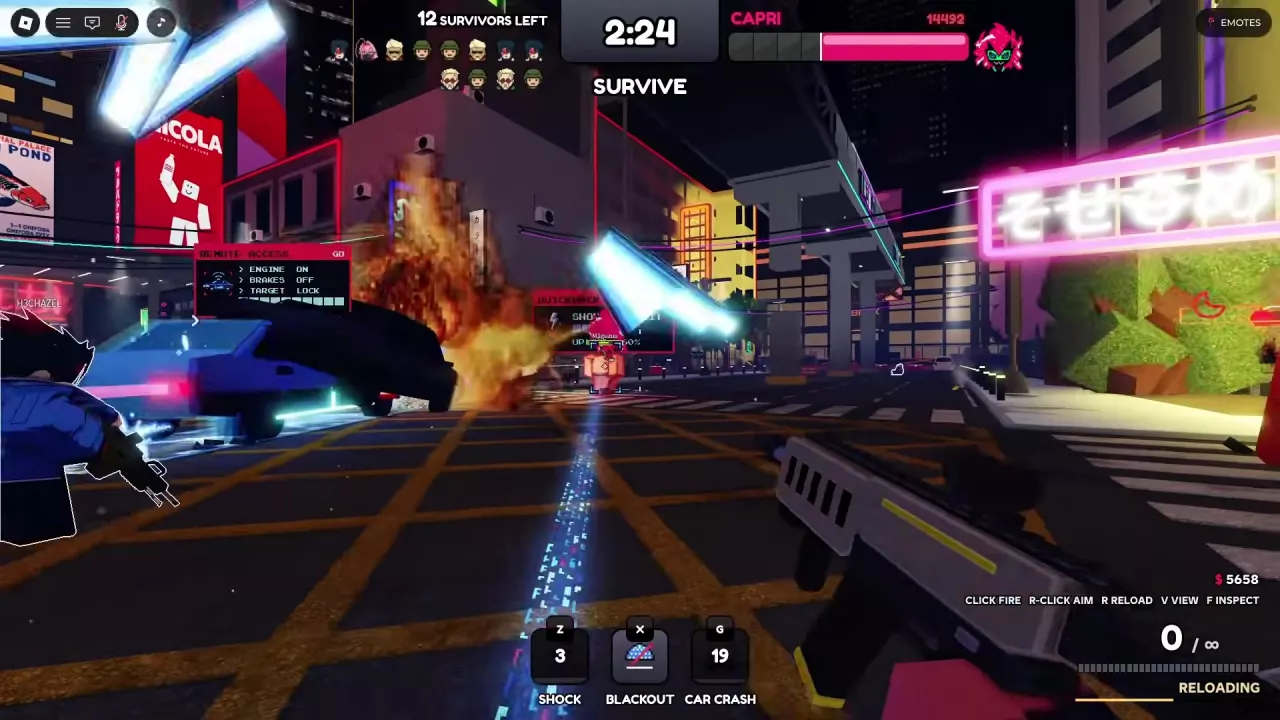
LOCKED; REMOTE ACCESS; OVERRIDE progress; ENGINE ON; BRAKES OFF; TARGET LOCK; EXECUTE. (During vehicle arrival and takeover sequences)
Indoor use
Yes (Corridor fight against Adam)
Example cooldown remaining
20 seconds (After activation during an indoor fight against Adam)
21 seconds (After activation during a street fight against Capri)
Street sequence
A blue vehicle arrives, with overturned or burning vehicles later in the fight. (Street fight against Capri)

Psychosis

Effect
Activates Berserk. (Maine)
Approximate Berserk duration
7 seconds (Maine with Kang Tao Zhuo; example activation)
Damage taken reduction
65 % (Berserk active)
Speed increase
55 % (Berserk active in the Maine and Kang Tao Zhuo setup)
Zhuo fire rate multiplier
1.6 × (Berserk active)
No reload
Yes (Zhuo during Berserk)
Pellet damage
13 damage (Berserk panel for Zhuo)
Knockback
Yes (Berserk panel for Zhuo)
Approximate cooldown remaining
32 seconds (Psychosis slot while Berserk is already active)
Timers
Berserk's remaining duration and Psychosis's cooldown count down separately.
Ability of
Maine
Enhances during Berserk
Kang Tao Zhuo (Faster fire rate, no reload, listed pellet damage and knockback)

Cannon

Cooldown display
The slot counts down after use and becomes available again when the countdown ends.
Ability of
Maine

Fuel Cell

Cooldown display
The slot displays a countdown after use.
Ability of
Maine
Adam Smasher's Attacks and Skills
NamePC control
Backhand
Click (Playing as Adam)
Sandevistan
Shift (Playing as Adam)
Missile
E (Playing as Adam)
Crush
V (Playing as Adam)
Launch
F (Playing as Adam)

Backhand

Type
Attack
Cooldown feedback
The attack icon displays a cooldown counter after use.
Use during interference
Backhand can still be used during the demonstrated BLACKOUT interference. (The indoor pursuit in which Sandy and Missile display NO SIGNAL)
Used by
Adam Smasher
Used during
JAMMED (BLACKOUT pursuit example)

Sandevistan

Type
Active skill
Skill bar name
SANDY
Activation feedback
A blue screen effect, SANDEVISTAN meter and DODGED counter appear.
Meter behavior
The meter can decrease while Adam continues moving and pursuing survivors. (Late indoor pursuit)
Counter behavior
DODGED can increase during combat. (While the status is active)
Follow-up status
The status display can change from SANDEVISTAN to OVERCLOCK; OVER CLOCK is another displayed spelling. (During the pursuit)
Cooldown feedback
Sandy enters cooldown after activation.
Signal interference
Sandy can display NO SIGNAL during BLACKOUT / JAMMED, then return to its normal icon as interference ends. (Indoor hunt)
Used by
Adam Smasher
Can display
NO SIGNAL (During BLACKOUT / JAMMED)

Missile

Type
Active skill
Skill feedback
An aiming frame and projectile trail accompany the attack. (Indoor pursuit)
Remaining cooldown example
13 seconds (Approximately; displayed after a use during the early indoor pursuit)
Signal interference
Missile can display NO SIGNAL during BLACKOUT / JAMMED and return to its normal icon as interference ends. (Indoor hunt)
Used by
Adam Smasher
Can display
NO SIGNAL (During BLACKOUT / JAMMED)

Crush

Type
Active skill
Cooldown feedback
The skill icon displays a countdown after use.
Remaining cooldown example
18 seconds (Approximately; displayed after use while pursuing Janne)
19 seconds (Displayed after use near the library)
19 seconds (Approximately; displayed after use while pursuing H3CHAZEL)
Used by
Adam Smasher

Launch

Type
Active skill
Activation feedback
A LAUNCH countdown and highlighted ground area appear, followed by large visual effects. (Indoor pursuit)
Ground effect
A pink ground area and vertical light column. (Use while pursuing luvsscar in the storage area)
Camera behavior
The view can leave the building and show a high overhead perspective before returning indoors. (Launch pursuit sequences)
Remaining cooldown example
24 seconds (Approximately; displayed after uses in the early pursuit, near maintenance and while pursuing luvsscar)
23 seconds (Later cooldown display in the maintenance-area sequence)
Countdown example start
1.1 seconds (Visible portion of the countdown near maintenance and while pursuing luvsscar)
Countdown example end
0.1 seconds (Later visible countdown value in those sequences)
Used by
Adam Smasher
Capri Attacks and Abilities
NameControlType
Redline
Click (PC)
Basic attack
Overdrive
Shift (PC)
Vehicle mobility
Watch
E (PC)
Awareness
Thunder
Q (PC)
Lightning ability
Satellite
R (PC; activate Satellite)
Targeted satellite strike

Redline

Use
Attack nearby survivors during pursuit.
Damage example
33 damage (One encounter with CRYO)
Jammed display
Retains the click prompt or countdown while the other four ability slots display NO SIGNAL. (BLACKOUT with JAMMED)
Used by
Capri

Overdrive

Use
A car carries Capri quickly along streets and through intersections, with a pink or red trail.
Cooldown remaining example
24 seconds (One chase after activation)
Used by
Capri
Displays
NO SIGNAL (BLACKOUT with JAMMED)

Watch

Visible effect
Multiple survivors appear as red outlines during RED://WATCH. (RED://WATCH active)
Countdown example
20 seconds (Example chase that started with 15 survivors)
25 seconds (Other example chases that started with 14 survivors)
Used by
Capri
Displays
NO SIGNAL (BLACKOUT with JAMMED)

Thunder

Visible effect
Red ground-area effects and pink or red lightning accompany casts during street combat.
Countdown example
11 seconds (Approximately, after example casts)
Used by
Capri
Displays
NO SIGNAL (BLACKOUT with JAMMED)

Satellite

Switch target
A/D or the interface's left and right arrows (SAT-07 target feed)
Drop strike
Click DROP or press R (SAT-07 target feed)
Target display
Current survivor name, position, and a highlighted target under TRACKING. (SAT-07 target feed)
Ground warning
Circular warning areas and IMPACT countdowns precede light columns or impact effects. (After DROP)
Cooldown remaining example
49 seconds (After returning to street combat in example uses)
Used by
Capri
Uses the target feed of
SAT-07
Displays
NO SIGNAL (BLACKOUT with JAMMED)
  • Flashbang

    Key
    Z (Flashbang, King's Shot and Smoke loadout)
    Cooldown display
    The slot counts down after use and returns to its icon.
  • King's Shot

    Key
    X (Flashbang, King's Shot and Smoke loadout)
    Cooldown display
    The slot displays a countdown after use.
  • Smoke

    Key
    G (Flashbang, King's Shot and Smoke loadout)
    Effect
    Creates a smoke area where HIDDEN can provide healing while you keep shooting.
    Healing rate
    5 HP/s (HIDDEN active inside the smoke)
  • Shock

    Key
    Z (Shock, Blackout and Car Crash loadout)
    Effect
    Uses a Short Circuit quickhack sequence with upload progress, execution feedback and electrical effects near the target. (Combat against Adam or Capri)
  • Blackout

    Key
    X (Shock, Blackout and Car Crash loadout)
    Effect
    Darkens and desaturates the scene while affected killer abilities display NO SIGNAL. Character outlines remain visible. (During the interference countdown)
  • Car Crash

    Key
    G (Shock, Blackout and Car Crash loadout)
    Effect
    Brings a vehicle into the fight, with lock and remote takeover feedback.
  • Cannon

    Key
    Z (Maine loadout)
    Cooldown display
    The slot counts down after use and becomes available again when the countdown ends.
  • Fuel Cell

    Key
    X (Maine loadout)
    Cooldown display
    The slot displays a countdown after use.
  • Psychosis

    Key
    G (Maine loadout)
    Effect
    Activates Berserk. (Maine)
  • Backhand

    PC control
    Click (Playing as Adam)
    Cooldown feedback
    The attack icon displays a cooldown counter after use.
  • Sandevistan

    PC control
    Shift (Playing as Adam)
    Skill bar name
    SANDY
    Activation feedback
    A blue screen effect, SANDEVISTAN meter and DODGED counter appear.
  • Missile

    PC control
    E (Playing as Adam)
    Skill feedback
    An aiming frame and projectile trail accompany the attack. (Indoor pursuit)
  • Crush

    PC control
    V (Playing as Adam)
    Cooldown feedback
    The skill icon displays a countdown after use.
  • Launch

    PC control
    F (Playing as Adam)
    Activation feedback
    A LAUNCH countdown and highlighted ground area appear, followed by large visual effects. (Indoor pursuit)
  • Redline

    Control
    Click (PC)
    Use
    Attack nearby survivors during pursuit.
  • Overdrive

    Control
    Shift (PC)
    Use
    A car carries Capri quickly along streets and through intersections, with a pink or red trail.
  • Thunder

    Control
    Q (PC)
    Visible effect
    Red ground-area effects and pink or red lightning accompany casts during street combat.
  • Watch

    Control
    E (PC)
    Visible effect
    Multiple survivors appear as red outlines during RED://WATCH. (RED://WATCH active)
  • Satellite

    Control
    R (PC; activate Satellite)
    Type
    Targeted satellite strike
    Target display
    Current survivor name, position, and a highlighted target under TRACKING. (SAT-07 target feed)

Smoke: Heal While Hidden and Keep Shooting

Smoke heals at 5 HP per second while HIDDEN is active inside the smoke. You can shoot and reload during that state, making it useful when you need health but still have a firing angle on the killer.

  1. Check that Smoke occupies your G slot and is ready.
  2. Press G, then move into the smoke.
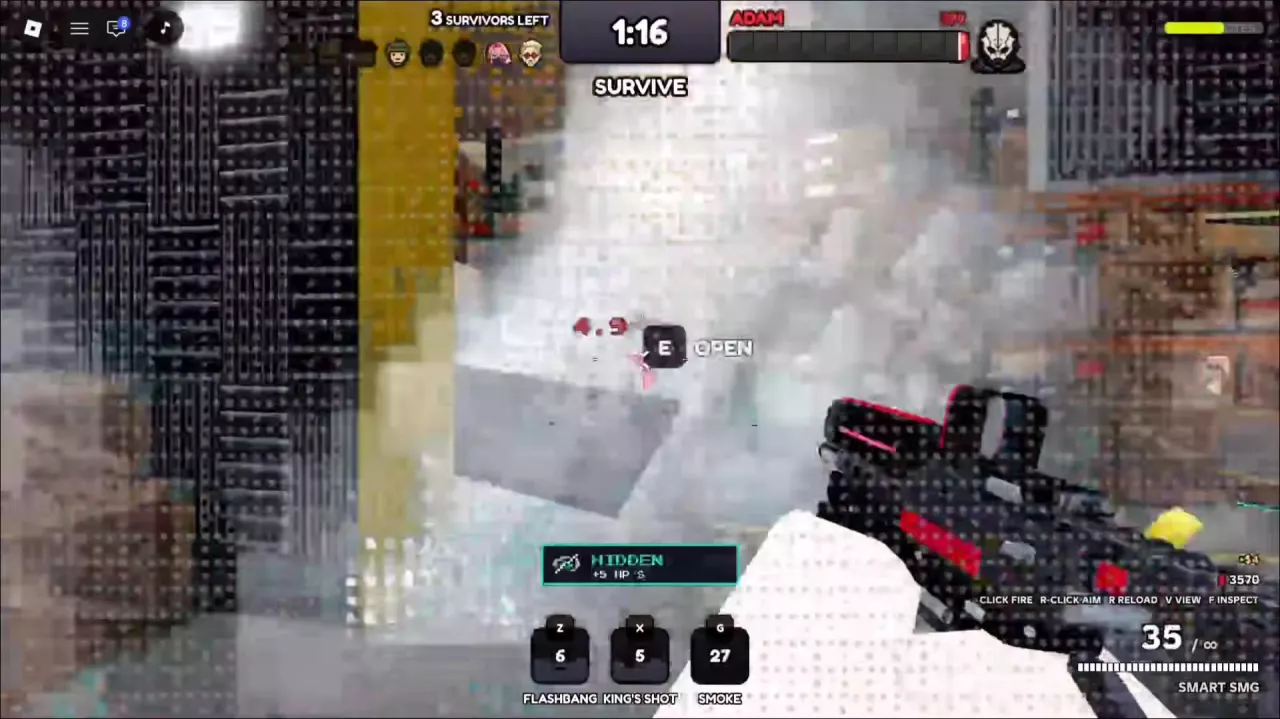
  3. Look for HIDDEN and +5 HP/S above your ability bar to confirm that healing is active.
  4. Keep firing at the killer and reload when needed while maintaining that position.
  5. When you move out, watch the status indicator: HIDDEN can disappear even while smoke remains visible nearby.

On the street against Capri, use the smoke area as a recovery position while continuing ranged fire. In a tower doorway fight against Adam, the same healing state lets you keep shooting through the doorway while recovering.

Use the status indicator to judge whether healing is active. Do not treat HIDDEN as a guarantee of invulnerability or freedom from targeting. If holding the smoke position puts you too close to danger, prioritize moving; the survivor strategy guide covers when to fight, heal or retreat.
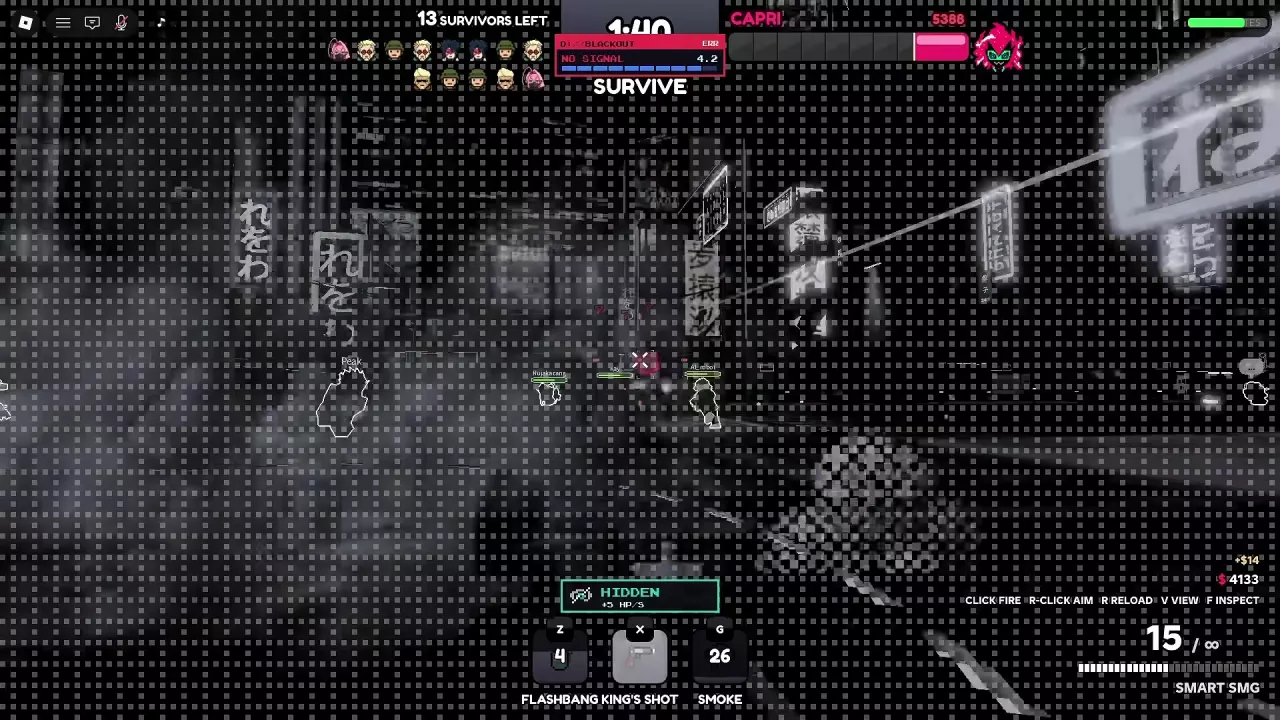
HIDDEN and +5 HP/S above the ability bar while firing from street smoke.
Smoke fills a tower doorway while HIDDEN and +5 HP/S remain active.

Shock: Follow the Short Circuit Upload

Shock is Z in the Shock, Blackout and Car Crash loadout. It initiates a Short Circuit quickhack, and the affected killer can enter SHORT CIRCUIT // SLOWED.

  1. Wait until Shock is available and face the combat target.
  2. Press Z.
  3. Watch for QUICKHACK, SHORT CIRCUIT and the upload progress near the target.
  4. Follow the execution message and electrical effects as the hack completes, while continuing the fight.

Against Adam indoors, Shock can accompany gunfire with blue electrical effects and Short Circuit feedback near him. Against Capri in the street, follow the same upload and execution sequence while maintaining ranged pressure.

Shock is useful for adding disruption to your shooting because Short Circuit can slow the killer. Cripple Movement's LOCOMOTION −40% and Overheat are separate status messages; neither is a fixed Shock effect. See combat status effects for those distinctions.

Short Circuit execution feedback appears over Capri during a street fight.

Blackout: Create a Disruption Window

With Blackout in your X slot, press X when it is ready. The scene darkens and loses color, but character outlines remain visible. Use those outlines to keep aiming and firing during the interference.

On the killer's HUD, JAMMED accompanies NO SIGNAL on affected abilities:

Killer Abilities that can show NO SIGNAL Other attack slots during interference
Adam Smasher Sandy / Sandevistan, Missile Backhand, Crush and Launch retain their normal HUD states; Backhand can still be used.
Capri Overdrive, Thunder, Watch, Satellite Redline retains its click prompt or cooldown display.

Use this window to maintain pressure while selected killer skills are disrupted. Keep your distance: Blackout does not stop every attack.

The ability cooldown and the interference timer are separate. The countdown in your X slot controls when you can cast again; NO SIGNAL or JAMMED tracks the active disruption. When interference ends, affected slots return to their icons or cooldown displays. A later Blackout can disrupt them again, so a brief recovery followed by another jam is possible.
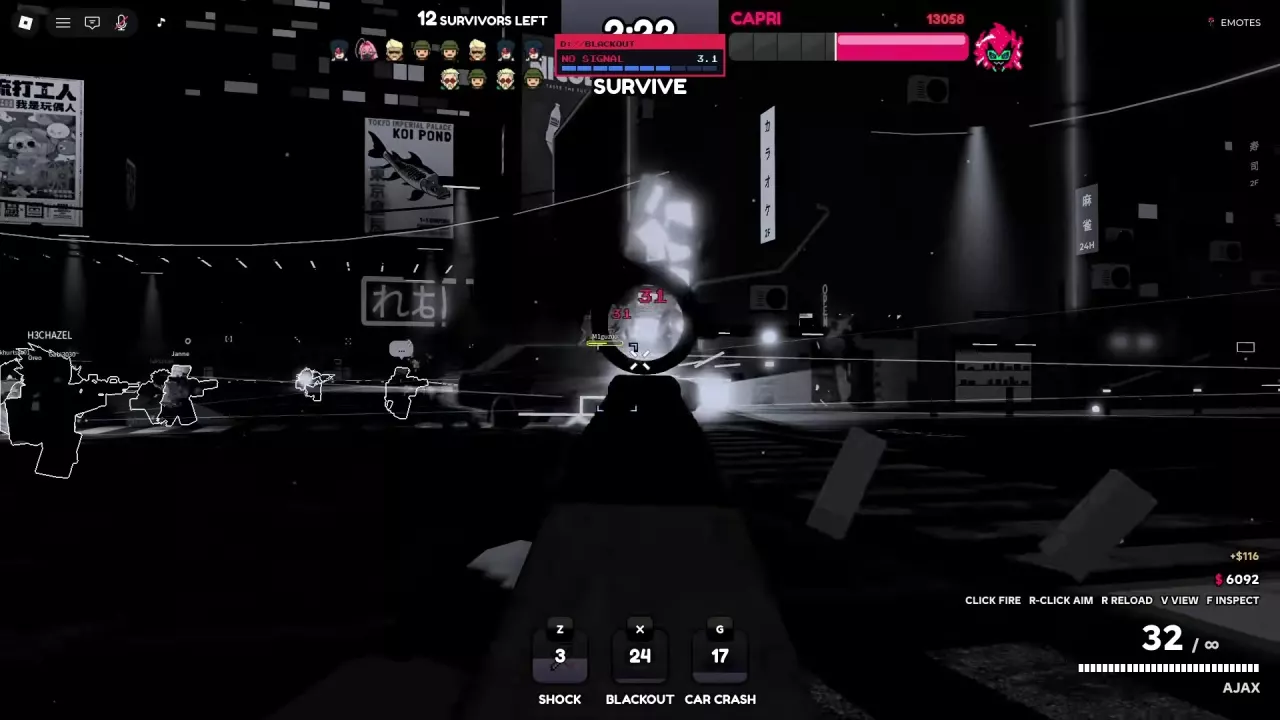
Aiming at Capri through visible outlines during Blackout's NO SIGNAL countdown.

Car Crash: Read Lock and Vehicle Takeover Feedback

Car Crash is G in the Shock and Blackout loadout. It brings a vehicle into the fight and provides lock, arrival and remote takeover feedback.

  1. Check that Car Crash's icon is ready.
  2. Face the fight and press G.
  3. Watch for LOCKED, the blue ground effect and the arriving vehicle as the ability enters cooldown.
  4. Keep moving and fighting while the vehicle sequence unfolds.

Indoor corridor against Adam

Car Crash can be used inside a corridor. A blue vehicle can arrive along the hallway after the lock and ground effects, with CLEAR and INCOMING appearing during the sequence. You do not need to leave the building just to use the ability in this setting.

Street fight against Capri

A street activation can bring in a blue vehicle with a REMOTE ACCESS panel and OVERRIDE progress. Read the feedback as the takeover advances:

Message Meaning in the vehicle sequence
REMOTE ACCESS / OVERRIDE Vehicle takeover is progressing.
ENGINE ON The engine has been started.
BRAKES OFF The brakes have been disengaged.
TARGET LOCK The takeover has reached target lock.
EXECUTE The sequence is executing.
VEHICLE INBOUND An approaching vehicle is being announced.
REMOTE CRASH Crash feedback appears during the collision sequence.

Use these messages to follow the vehicle attack while keeping up gunfire. Capri's own Overdrive car is a separate ability; nearby cars, fires and explosions are not interchangeable indicators of your Car Crash hitting a target.
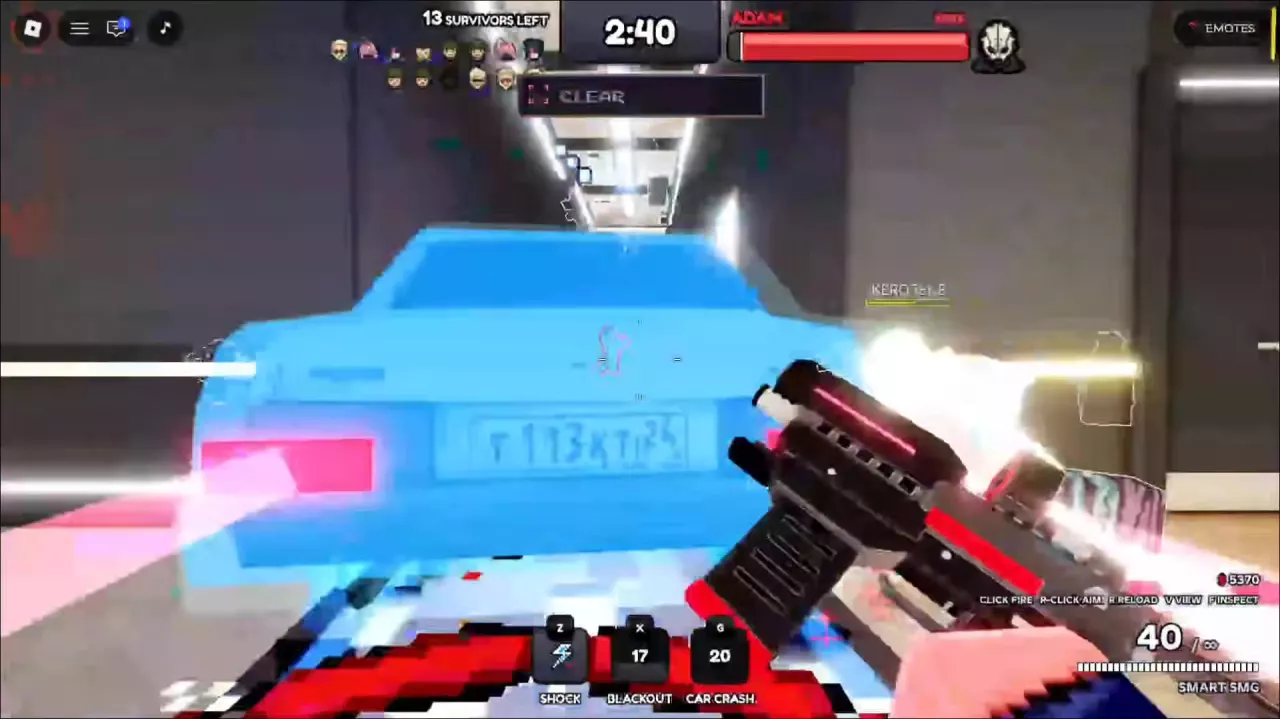
A blue Car Crash vehicle arrives in an indoor corridor with the G slot on cooldown.
REMOTE ACCESS lists ENGINE ON, BRAKES OFF and TARGET LOCK beside a street vehicle.

Berserk and Killer Ability Guides

  • Maine: Press G for Psychosis to activate Berserk. With Kang Tao Zhuo, the buff increases fire rate and enables NO RELOAD, creating a window for sustained moving fire. Its buff timer runs separately from Psychosis's cooldown. Follow the Maine, Zhuo and Berserk guide for the full firing and reloading cycle.
  • Adam Smasher: Shift activates Sandy and the Sandevistan state, with a meter and DODGED counter; the status can later change to OVERCLOCK. Use the Adam Smasher guide to combine it with his attacks and pursuit.
  • Capri: Overdrive's car helps close distance, while Satellite provides a target feed for selecting a survivor and dropping a strike. The Capri killer guide covers her vehicle, tracking and satellite controls together.

If you are receiving NO SIGNAL, SLOWED, OVERHEAT or tracking warnings, use the status effects guide to identify the message and understand what you can still do.